Permítame mostrarle rápidamente cómo conectar el servidor de Windows desde Ansible ejecutándose en Ubuntu.
Para seguir los pasos a continuación, debe tener Python 3.x y Ansible instalados en ambos sistemas. Puede seguir los siguientes artículos si necesita ayuda.
¿Cómo instalar y configurar Ansible en Ubuntu?
¿Cómo instalar Ansible en Windows?
A continuación se muestran los detalles de los dos servidores que estoy usando:
- Controlador Ansible – 192.168.0.108
- Servidor Windows: 192.168.0.102
Tabla de contenido
Paso 1: Cree un usuario de Windows Ansible
Cree un nuevo usuario para la configuración de conexión de Windows Ansible.
- Abra Administración de equipos en su sistema Windows y vaya a Usuarios y grupos locales.
- Haga clic derecho en Usuarios y cree un nuevo usuario.
- Seleccione la casilla de verificación La contraseña nunca caduca y haga clic en crear.
- Ahora, entre los grupos disponibles, haga clic derecho en el grupo Administradores y haga clic en propiedades.
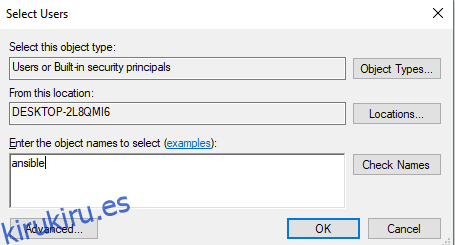
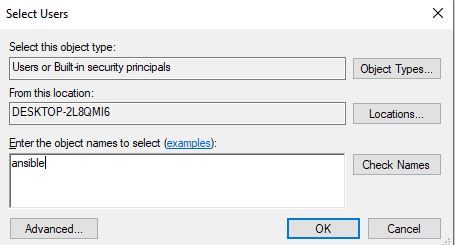
- Haga clic en Agregar e ingrese ansible en los nombres de los objetos.
- Haga clic en la opción de verificación de nombres y luego en Aceptar.
Ahora, un usuario ansible en una máquina con Windows está listo.
Paso 2: Configurar bibliotecas y WinRM
Vaya a su máquina controladora ansible, actualícela e instale las bibliotecas que se mencionan a continuación.
[email protected]:~$ sudo apt-get update
[email protected]:~$ sudo apt-get install gcc python-dev
[email protected]:~$ sudo apt install python3-pip
WinRM significa administración remota de Windows. Le permite realizar tareas de administración en sistemas remotos de Windows. Instalaremos python3-winrm, un cliente de python que se utiliza para establecer una conexión con el sistema de Windows.
[email protected]:~$ sudo apt-get install python3-winrm
Reading package lists... Done
Building dependency tree
Reading state information... Done
The following packages were automatically installed and are no longer required:
gyp libc-ares2 libhttp-parser2.8 libjs-async libjs-inherits libjs-is-typedarray libjs-node-uuid libuv1 libuv1-dev node-abbrev node-ajv
node-ansi node-ansi-color-table node-ansi-regex node-ansi-styles node-ansistyles node-aproba node-archy node-are-we-there-yet node-async

node-validate-npm-package-license node-wcwidth.js node-which node-which-module node-wide-align node-wrap-ansi node-wrappy node-y18n
node-yallist node-yargs node-yargs-parser nodejs nodejs-doc
Use 'sudo apt autoremove' to remove them.
The following additional packages will be installed:
python3-kerberos python3-ntlm-auth python3-requests-kerberos python3-requests-ntlm python3-xmltodict
The following NEW packages will be installed:
python3-kerberos python3-ntlm-auth python3-requests-kerberos python3-requests-ntlm python3-winrm python3-xmltodict
0 upgraded, 6 newly installed, 0 to remove and 231 not upgraded.
Need to get 84.8 kB of archives.
After this operation, 442 kB of additional disk space will be used.
Do you want to continue? [Y/n] Y
Get:1 http://old-releases.ubuntu.com/ubuntu cosmic/universe amd64 python3-kerberos amd64 1.1.14-1build1 [16.8 kB]
Get:2 http://old-releases.ubuntu.com/ubuntu cosmic/universe amd64 python3-ntlm-auth all 1.1.0-1 [19.6 kB]
Get:3 http://old-releases.ubuntu.com/ubuntu cosmic/universe amd64 python3-requests-kerberos all 0.11.0-2 [10.1 kB]
Get:4 http://old-releases.ubuntu.com/ubuntu cosmic/universe amd64 python3-requests-ntlm all 1.1.0-1 [6,004 B]
Get:5 http://old-releases.ubuntu.com/ubuntu cosmic/universe amd64 python3-xmltodict all 0.11.0-2 [10.6 kB]
Get:6 http://old-releases.ubuntu.com/ubuntu cosmic/universe amd64 python3-winrm all 0.3.0-2 [21.7 kB]
Fetched 84.8 kB in 1s (70.3 kB/s)
Selecting previously unselected package python3-kerberos.
(Reading database ... 244430 files and directories currently installed.)
Preparing to unpack .../0-python3-kerberos_1.1.14-1build1_amd64.deb ...
Unpacking python3-kerberos (1.1.14-1build1) ...
Selecting previously unselected package python3-ntlm-auth.
Selecting previously unselected package python3-xmltodict.
Preparing to unpack .../4-python3-xmltodict_0.11.0-2_all.deb ...
Unpacking python3-xmltodict (0.11.0-2) ...
Selecting previously unselected package python3-winrm.
Preparing to unpack .../5-python3-winrm_0.3.0-2_all.deb ...
Unpacking python3-winrm (0.3.0-2) ...
Setting up python3-kerberos (1.1.14-1build1) ...
Setting up python3-winrm (0.3.0-2) ...
Paso 3: actualice el archivo de inventario de Ansible
Ahora, editaré el archivo de hosts ansible con la dirección IP del sistema de Windows. Entonces ahora ansible sabrá qué sistema de Windows necesita conectarse.
[email protected]:~$ sudo gedit /etc/ansible/hosts

[win]
192.168.0.102
Paso 4: actualice las variables de grupo de Ansible
Cree un directorio para poner las variables necesarias para conectarse al sistema de Windows.
[email protected]:~$ mkdir /etc/ansible/group_vars
[email protected]:~$ sudo chmod -R 777 /etc/ansible/
Cree un archivo win.yaml y coloque los detalles de usuario que creó en el primer paso y algunas variables más necesarias para conectarse al sistema de Windows.
[email protected]:~$ gedit /etc/ansible/group_vars/win.yaml
---

ansible_user: ansible

ansible_password: ansible

ansible_connection: winrm

ansible_winrm_server_cert_validation: ignore

ansible_winrm_transport: basic

ansible_winrm_port: 5985

ansible_python_interpreter: C:Userskirukiru.esAppDataLocalProgramsPythonPython37python
Paso 5: Configure los servidores de Windows para administrar
Abra su Power Shell de Windows y actualícelo. Debe tener Powershell 3.0 y .NET Framework 4.0 presentes en la máquina con Windows.
PS C:WINDOWSsystem32> $url = "https://raw.githubusercontent.com/jborean93/ansible-windows/master/scripts/Upgrade-PowerShell.ps1"
PS C:WINDOWSsystem32> $file = "$env:tempUpgrade-PowerShell.ps1"
PS C:WINDOWSsystem32> $username = "ansible"
PS C:WINDOWSsystem32> $password = "ansible"
PS C:WINDOWSsystem32> (New-Object -TypeName System.Net.WebClient).DownloadFile($url, $file)
PS C:WINDOWSsystem32> Set-ExecutionPolicy -ExecutionPolicy Unrestricted -Force
PS C:WINDOWSsystem32> &$file -Version 5.1 -Username $username -Password $password -Verbose
Para configurar WinRM en un sistema Windows con ansible, ansible ha proporcionado un script de configuración remota. Ejecute el script en PowerShell.
PS C:WINDOWSsystem32> $url = "https://raw.githubusercontent.com/ansible/ansible/devel/examples/scripts/ConfigureRemotingForAnsible.ps1"
PS C:WINDOWSsystem32> $file = "$env:tempConfigureRemotingForAnsible.ps1"
PS C:WINDOWSsystem32> (New-Object -TypeName System.Net.WebClient).DownloadFile($url, $file)
PS C:WINDOWSsystem32> powershell.exe -ExecutionPolicy ByPass -File $file
PS C:WINDOWSsystem32> winrm enumerate winrm/config/Listener

Listener
Address = *
Transport = HTTP
Port = 5985
Hostname
Enabled = true
URLPrefix = wsman

CertificateThumbprint
ListeningOn = 127.0.0.1, 169.254.8.240, 169.254.36.9, 169.254.102.217, 169.254.215.170, 192.168.0.102, ::1, fe80::3131:c6d7:9ef5:8f0%7, fe80::51b7:9134:550d:d7aa%22, fe80::88f1:1229:e1dd:2409%16, fe80::99cf:5796:4f8e:f5c1%15, fe80::fd77:c19d:e0f2:66d9%9

Listener
Address = *
Transport = HTTPS
Port = 5986
Hostname = DESKTOP-2L8QMI6
Enabled = true
URLPrefix = wsman

CertificateThumbprint = C83B3FC8B274D0B650F0FD647DC7AC129BBE3FA0
ListeningOn = 127.0.0.1, 169.254.8.240, 169.254.36.9, 169.254.102.217, 169.254.215.170, 192.168.0.102, ::1, fe80::3131:c6d7:9ef5:8f0%7, fe80::51b7:9134:550d:d7aa%22, fe80::88f1:1229:e1dd:2409%16, fe80::99cf:5796:4f8e:f5c1%15, fe80::fd77:c19d:e0f2:66d9%9
Configure winrm para permitir el tráfico HTTP.
PS C:WINDOWSsystem32> winrm set winrm/config/service '@{AllowUnencrypted="true"}'
Service
RootSDDL = O:NSG:BAD:P(A;;GA;;;BA)(A;;GR;;;IU)S:P(AU;FA;GA;;;WD)(AU;SA;GXGW;;;WD)

MaxConcurrentOperations = 4294967295

MaxConcurrentOperationsPerUser = 1500

EnumerationTimeoutms = 240000
MaxConnections = 300

MaxPacketRetrievalTimeSeconds = 120
AllowUnencrypted = true
Auth
Basic = true
Kerberos = true
Negotiate = true
Certificate = false
CredSSP = false

CbtHardeningLevel = Relaxed
DefaultPorts
HTTP = 5985
HTTPS = 5986
IPv4Filter = *
IPv6Filter = *

EnableCompatibilityHttpListener = false

EnableCompatibilityHttpsListener = false

CertificateThumbprint
AllowRemoteAccess = true
Establezca la autenticación en básica en Wirm.
PS C:WINDOWSsystem32> winrm set winrm/config/service/auth '@{Basic="true"}'
Auth
Basic = true
Kerberos = true
Negotiate = true
Certificate = false
CredSSP = false
CbtHardeningLevel = Relaxed
Paso 6: Pruebe la conectividad con el servidor de Windows
Ahora todos los pasos en la máquina están hechos. Vaya a la máquina del controlador ansible y haga ping a la máquina del servidor de Windows usando el módulo ansible win_ping.
[email protected]:~$ ansible win -m win_ping
192.168.0.102 | SUCCESS => {

"changed": false,
"ping": "pong"
}
El mensaje de éxito muestra que se ha establecido la conexión. Ahora, el sistema de Windows está listo para ser administrado de forma remota desde Ansible ejecutándose en Ubuntu.